Also, until now the cost of white LED (Light Emitting Diode) lights have been prohibitive - but one of our sailing buddies has found the Super Bright LED site where you can purchase LED bulbs for interior lighting up to and including navigation lights. Laura is replacing her low down lamps which draw 25 watts each (or a little over 2 amps each) with LEDs that draw .2 amps each! That's some savings - especially when overnight racing.
Another incentive to change the lighting is that one of my overhead lights' bulb burned out and in the process of replacing it, the whole thing fell apart. Since I had to replace the fitting anyway, I thought I'd try the LED thing, which is less expensive by an order of magnitude than replacement of the fitting.


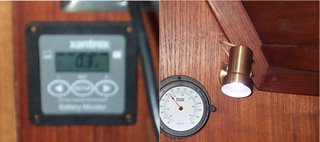
Above is an example of the kinds of power saving possible - at least with a spot/reading lamp. The first picture is of the Xantrex reading with the incandescent bulb, and the other with the LED. To get the thing to work, I had to rewire the lamp because the LEDs are polarity-sensitive. This is important, because I thought the bulbs were bad, but when all three didn't work, I knew that wasn't the case. But these bulbs (bayonette, one contact) are $9.99 each and they last for 10,000 hours.
You can see the difference is marked - 1.5 amps to .3, and this is the biggest brightest bulb I could get (19 LEDs as opposed to 12).
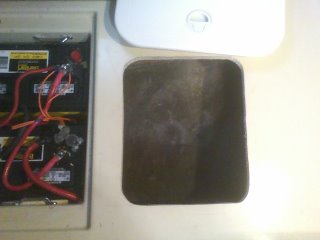
So, I removed all the other lighting fittings and brought them home so I could work in comfort. First, I disassembled the lamps. They're typical Guest lamps. They're cheaply built, and have only been saved from certain corrosion into oblivion by the fact that Herb and I keep a really dry boat. The only thing I kept from the fitting was the switch. This picture shows the fittings beforehand. Notice I'm replacing those silly bulbs with a 36 diode array. Also notice the array has a socket on it, which I'm going to remove. The bulb in the fitting is held by two cheap clamps, and they fall apart when you remove the bulb. The first step is to remove everything and clean up the fitting. I used a drill to remove the remaining bulb holders, and de-soldered the switches. It turns out the wiring was all cheap - like speaker wire, and showed corrosion inside insulation. So, here's what I have to say about that: I hope Guest has upgraded their manufacturing. If they're making stuff for the marine industry, they should be doing it right with tinned wire.
Although you can't see it, the sockets are off the LED panels.

I drilled holes in the center of the fitting to run the LED's leads through. Next, I used a really terrific product, called 'AquaMend', an epoxy stick, that I got from West Marine, to attach the LED panels to the reflector side of the fitting. This stuff hardens in 5 minutes above the water or below! Everyone should have some. I made 1/2" balls and pressed the circuit board into them leaving the board slightly above the surface of the fitting to ensure there won't be any shorting.
 Finally, on the other side, I soldered the red lead to the switch, extended the black lead, and soldered a new red lead to the switch. Then I tested the light with a 12V power supply. The last thing was to put a dab of 3M 5200 where the leads come through the reflector so that if the lamp hangs on the leads, the stress isn't on the solder joint on the circuit board.
I also crimped on spade fittings so that the next person to remove these lamps doesn't have to cut the wires.
 I've reinstalled all these lamps and here's a picture. I think they will provide more light, and a much pleasanter white-blue color. I happen to like it, but not everyone will.
The last light, the spot, is pictured here all rewired.


