Rewiring the batteries was a snap - a couple of minutes. But getting the sensor/power cable from the power panel above the nav station to the batteries was a horror show - Herb took the whole lazarette apart to find a path for the thing, and finding that wasn't necessary, put the whole thing back together again!
Laura is doing essentially the same upgrades to her boat so was interested to see what this was all about, and got some pointers on how to do the wire crimping and so forth. And she has an incredible curiousity about all things mechanical/electrical on a boat. She's an awesome surgeon, yet thinks mechanical stuff is a mystery. Anyway, I'm glad to be able to impart some small wisdom to her.
Here are some quick pictures of the project.
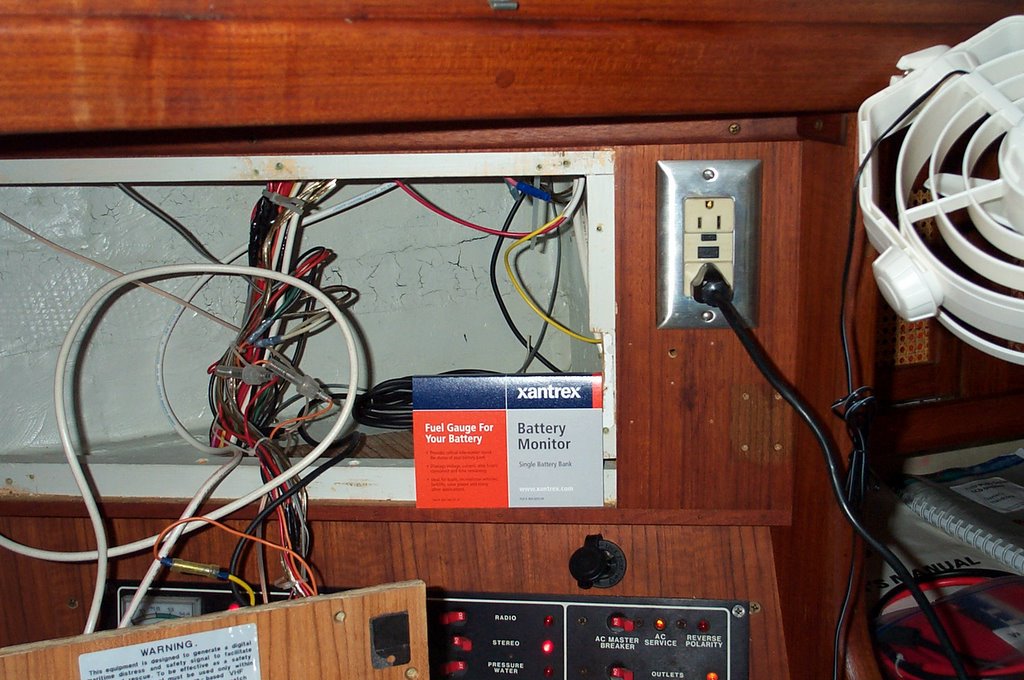
Here's the nav station with the main board out, getting ready to cut a hole for the monitor. I decided to put the monitor below the 120v plug so I leave what little real estate I have in the removable panel for something special, like a radar display.
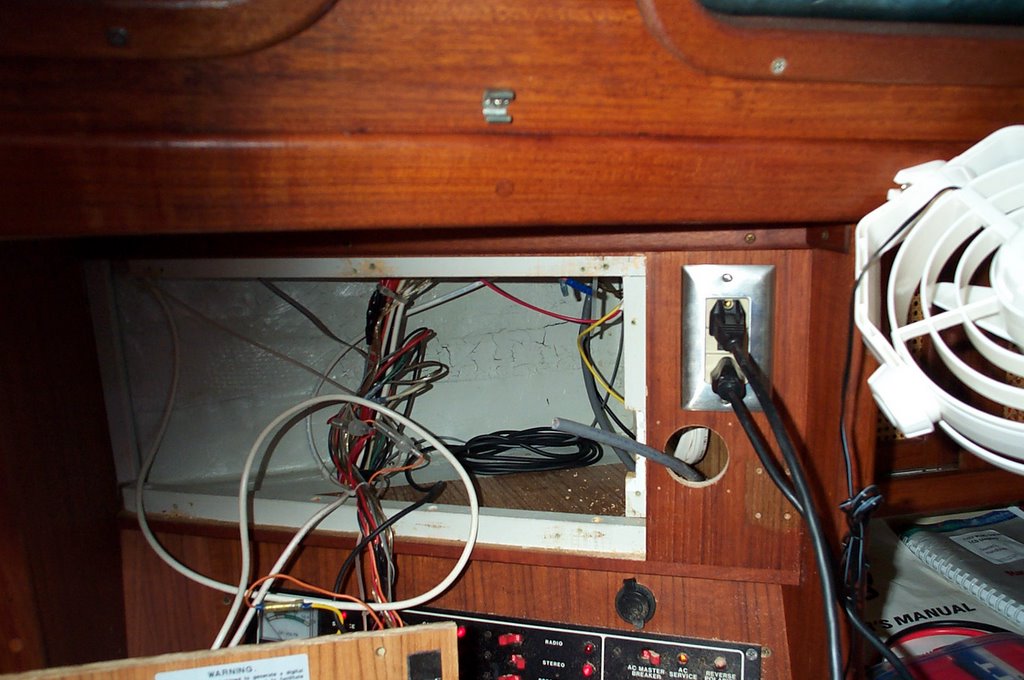
I really hate cutting holes in the boat - it seems so final. You really can't put the plug back in. Using the supplied template, I marked the center and the 4 screw holes. A 2" hole saw, and ba-da-boom, ba-da-bing, fuggeddaboudit!

Laura and Herb wired up the head (meter, whatever) according to the instructions. I was working in the battery well, so here's a picture of it wired. It turns out the terminal screws are little tiny screws - Laura volunteered to run to Grand Union and pick up an eye-glasses screwdriver for the task. Jack Rabbit provided 25 feet of 8 conductor cable for the installation - you only need 5 conductors unless you install the optional battery temperature monitor.
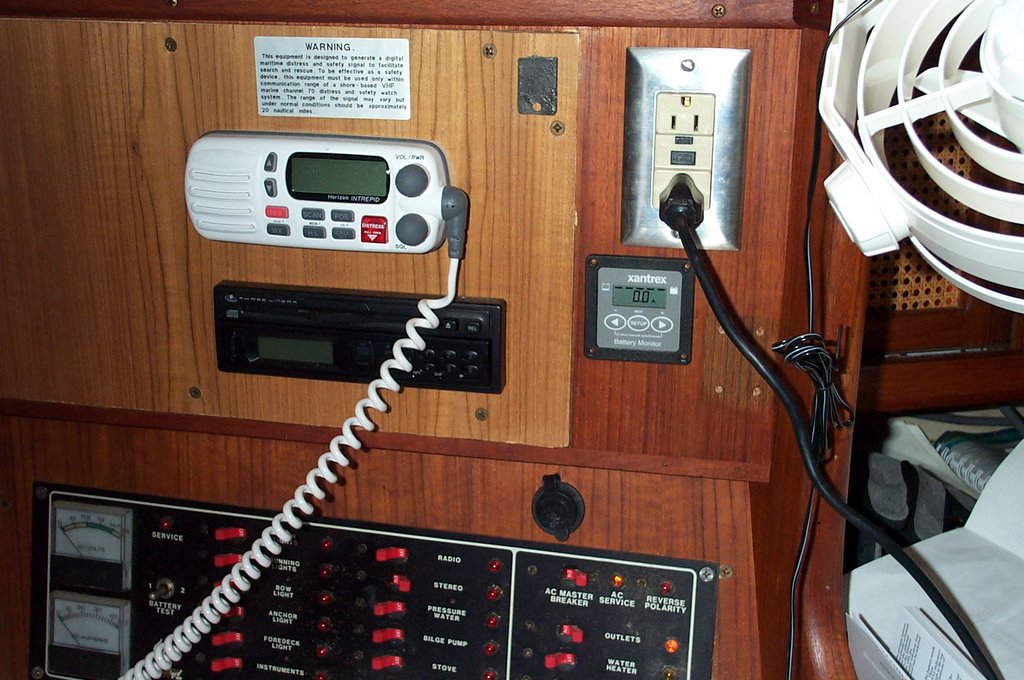
Here is the whole panel back in with the Xantex monitor on and functioning. Woohoo. The thing is incredible - it measures battery load down to .1 amp, and keeps track of amp hours used, number left (you have to tell it how many you have to begin with). And a whole bunch of other stuff. It's the beginning of an integrated power management system.
 The batteries are two group 29's (an odd size, I'm told, but they really are. It says so right on the battery). Ok, so the battery farthest away is battery #2, and nearest, #1. If you take the time to follow the wires, you'll see there's two big red wires and one black that connects both grounds. Hence, two banks of one battery each.
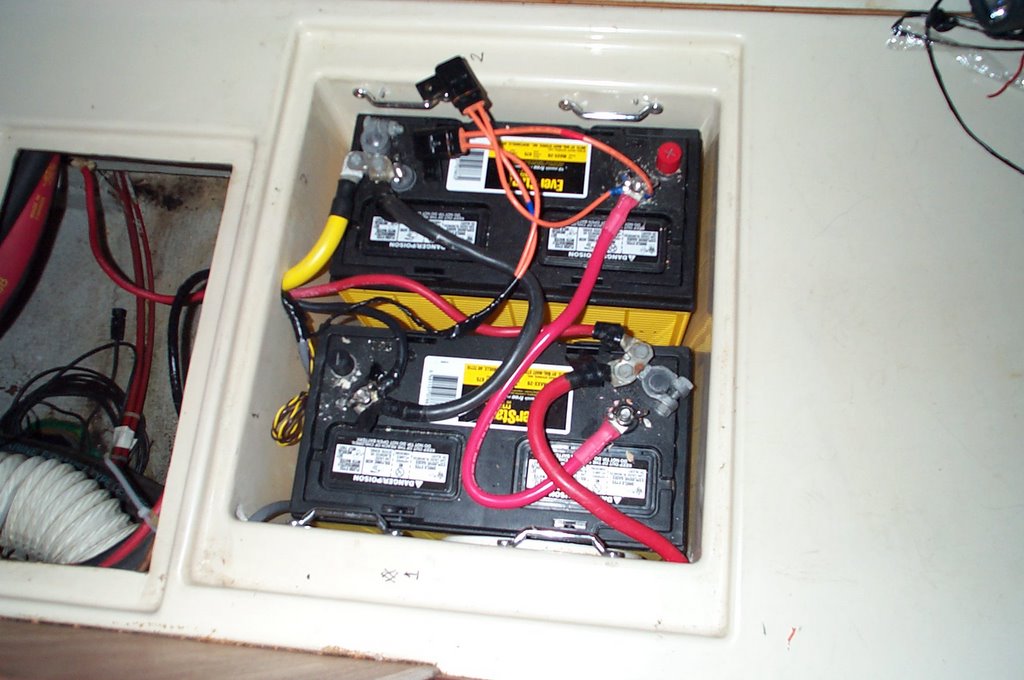 Now, the batteries are paralleled and connected to the battery switch's #1 position for a big house bank. The other red lead is actually laying in the opening at the left. I was thinking of putting the started battery in that hole, but it crowds the stuffing box. So not there - as it turns out, there's a huge area to the right of the battery box that can be, what else? A new battery box. I'll install a 12" x 15" hatch. I don't understand why this wasn't made a storage locker when the boat was built.
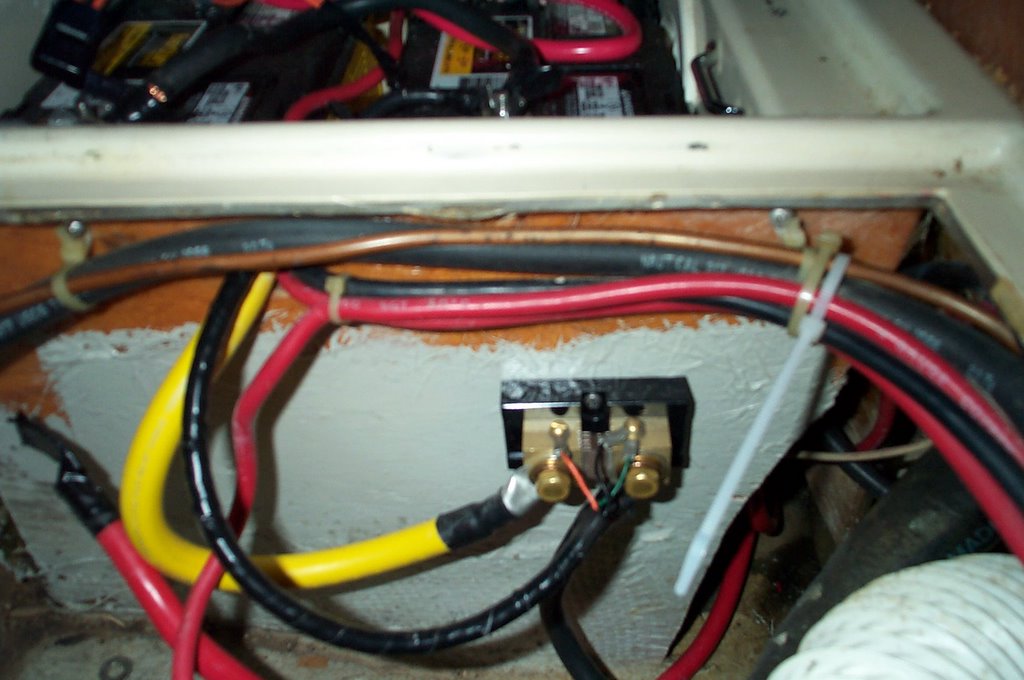 Finally, the device you see before you is the heart of the battery monitor - basically it's nothing more than a really big low resistance resistor. The monitor monitors the current across it. (Actually the voltage drop, but close enough. It can calculate the current from that.) That big yellow wire is the ground - new marine wiring standards suggest the ground in boats should be yellow on 12 volt systems so the black doesn't get confused with black hot in AC systems. A great idea.
After a hard day's work on this completely successful installation, Gina had a wonderful turkey dinner ready for us! A couple of glasses of wine, great food, and summer plans. Also - Laura and I are replacing our interior lamps with white LEDs. There's a company Super Bright LEDs that has really good prices for the bulbs - and they have 1/10 the power requirements of incandescent bulbs. So I'll let you know about them.
Now for something completely different. Renee has tackled a huge project that seems to include ripping out her heating system and well, apparently the whole interior as well. I'm dying to see what it looks like, so I surely do hope she sends some pictures along. Big job, and she's indicated that sometimes you can have too much help!
Well, next week I'll be installing solar panels, I hope.
See you on the water!


No comments:
Post a Comment