Sunday, April 30, 2006

Getting Cassiopeia Ready

One of the great thing about hanging around marinas and having friends that do things like the Newport to Bermuda race is that you get to see some very cool stuff going on. Often, you get to help, especially if it involves moving a lot of heavy stuff around. How could you not participate in that?

We moved Cassiopeia, a Beneteau 42.7 from Norwalk, Connecticut on Saturday - it was just a two hour ride, easy as pie. Since no sails were aboard, no sailing occured, but we still managed to down a box of Triscuits, a pound of Brie cheese, and a hot soprasata. Can't go sailing without food, you know.

Anyway, after arriving at Stanford, Ct. for the summer berth, I took off to my boat, now at the City Island Yacht Club (CIYC from now on). How I got Inertia there is a story of motoring through the rain and fog from Haverstraw the weekend before. That week, it was Triscuits, cheddar cheese, and pepperoni. But that's another story.

I spent the afternoon taking down my small headsail and rehoisting my big genoa. Then I had to go sailing, and because the wind was light, I practiced docking under sail and picking up my mooring under sail. If you own a sailboat, you should do this, too. It's fun and educational. Once again, I digress.
So, after putting the boat away, I had dinner at the club. Let me repeat: I had dinner at the club. I love saying that. My friends will soon get sick of me saying it. I suppose I will, too, when the novelty wears off. But for now, I must reiterate, I had dinner at the club.

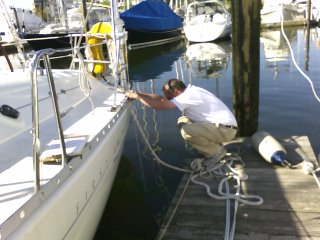
Ok, Sunday, (today), we had to go back to Cassiopeia to help the measurer measure her for the Newport - Bermuda race. Laura had two measurements made: ORR and IRC. You can look what they mean somewhere else. But the ORR measurement involves, in addition to some underbody measurements while the boat is out of the water, calculating the righting moment of the boat. For the Newport - Bermuda race, the righting moment must be 115 degrees or better.

The righting moment is a measurement of the ability of a boat to right itself if knocked down. Clearly, a boat with a low righting moment, like 90 degrees means that if the boat assumes an attitude of mast parallel to the water or lower, it will continue and turn over. That's not good. Boats like Sunfish's and so forth have a low righting moment - very easy to turn over. 115 degrees means that the mast can be up to 115 degrees from verticle and the boat will still right itself.
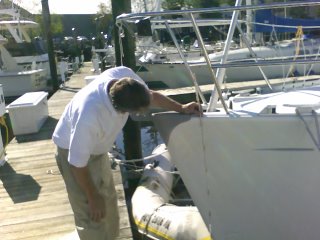
If you could get a boat to behave like a Weeble (Weebles wobble but they don't fall down), the you could have a really safe boat.

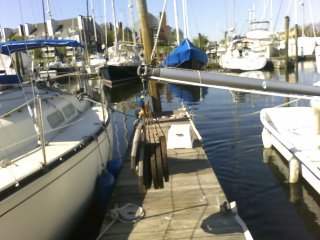
The way to measure this is to hang long poles out from the boat with lots of weight on them - and then move the weights and measure what happens to the boat. Well, it's a little more complex than that, but essentially, you want to tip the boat and see how hard it was to do.
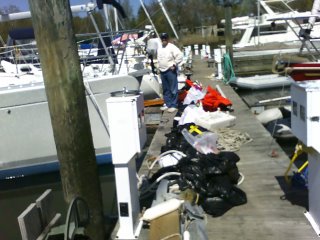
Also, because there are other measurement systems, like IRC, other rules apply; namely, you have to remove everthing from the boat except what it came with. Do you have any idea how much crap an empty boat has in it? Laura emptied hers before winter. This is what's left. Or half of it anyway. It continues along the finger, too.
Once the deck measuring was done, we sent Laura up the mast for all the measurements for sail hoist, mast height, and headstay length.

In case you're wondering what this whole thing costs besides a few hours with all your friends moving all your crap around is about $600. If you're serious about racing, especially offshore, this is what you'll need to do.

On another entirely different note, there is a company in Northport, Long Island that is owned and run by a really cool guy- a boater's engineer. The company is Sailor's Solutions, and I've put the link on the sidebar. If nothing else, call and get a catalog. There's really stuff you need and didn't know you needed it or that it even existed.

Their flagship product used to be their very own designed and manufactured sound proofing for engine rooms called SPM. If your engine is noisy and your sound insulation is falling apart, replace it with this stuff. It's great. I used it and even though I couldn't get to the aft wall of the engine room to remove or replace the old stuff, installing SPM still reduced the engine noise so much that I could actually listen to the radio down below when motoring. Highly recommended. It's strong (not like that mylar/foam stuff), it's solid foam with stiff surface, and it sticks like the dickens.

After I replaced all my interior lights with the LED's I started looking for navigation lights. It turns out Sailor's Solutions has designed and manufactured with the help of NASA some very cool lighting solutions. They were kind enough to send me a SensiBulb (their name) to try out. It has a slew of advantages, including being a yellowish light instead of the blue white, and it has temperature sensing so that it doesn't allow the LEDs to get too hot. Apparently they fail at 140 degrees - I didn't know that.

Soon they'll be carrying the new OPM navigation lighting. I want it. They'll have the best price, too, since I've also asked about that, too.

So more on that later - but really, give them a shout. I got a copy of their catalog and darn it all, there's stuff I want - even a really excellent winch handle holder. You don't know you need it. But you do. Trust me.

Anyway, it's sailing season - so now I really will see you on the water!
Monday, April 17, 2006

WOW! Simply WOW!

First, let me say this: I've been sadly derelict in my blogly duties. Sorry. There's much to report, and since I had to participate in these things, I didn't really have the time to write. Well, not strictly true. I was too tired.

That said, here goes. First, April 8th was the big opening of the City Island Yacht Club's kitchen for the year. So the club put on a wine tasting (mmmm...Wine...) and of course you could have dinner. My friend Laura came along, and we had a terrific time! The food was good and very reasonably priced. I don't believe I'll have any problem meeting my $500/year minimum. None at all.

It was amazing - when I visited in February, the place was a total disaster - walls torn apart, holes, general confusion. Yet Saturday last, it was beautiful! Newly painted, and absolutely fantastic! I can't say enough. I suspect I'll be helping out this year. It's a club to be proud of, and I believe I made absolutely the right choice!

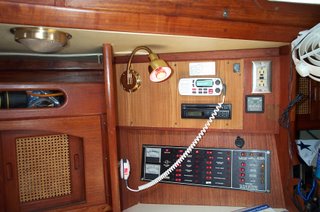
From the sublime to the mundane. Two projects needed finishing, the LED lighting with a red nav station light, and permanent mounting of the solar panels.

The nav station light was the hardest, believe it or not. First, I had purchased a red 19 LED single contact bayonet bulb for the purpose. Needless to say, I should have researched lighting first. The only manufacturer of bayonet socketed flexible gooseneck lights is Sea Dog, and theirs is a double contact socket. Ok, so I called them and no, they can't make one with a single contact. Feh!

Most of these new lights are xenon bulbs or high intensity bulbs with red filters. The sockets are nothing like anything useful for my purposes. So I purchased the light I wanted and ripped it apart. I epoxied an automotive single contact bayonet socket in it, and wired it all up. Great. The only thing I don't like is that the bulb is proud of the reflector, but you know what? if it becomes a problem, I'll think of something else.

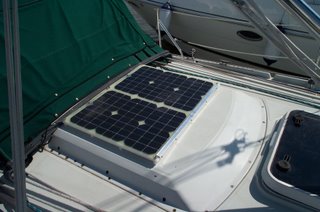
Next, I've been struggling on how to mount the solar panels permanently. It has to be strong enough to support my weight without flexing, and preferably maintenance free. My choice for maintenance free material is HDPE (High Density PolyEthylene). It's essentially Starboard, but cheaper because it's generic. It's easily machinable with either woodworking tools or machine tools, and it is totally inert. I mean really, really inert. So inert that the only method of joining is mechanical.

So, with my friend Leigh's help, I built a platform with wedges under to make up the curve on the sea hood over the companionway hatch. Because the HDPE is not dimensionally stable (it does expand and shrink some) I attached it centerline to the hood. that way it can expand and contract.

The panels slide under an aluminum angle mounted on the forward edge, and are screwed into the mounting at the other end. Originally I wanted to be able to move the panels when at a dock, but I don't really see the need. They're fine where they are.

Wedges underneath in milled slots make up for the curve in the seahood. I can stand on them if necessary although I hardly ever walk right there. Laura was impressed. She said it looked as if they belonged there.

We went sailing Easter day when it was sunny. The panels provide enough power in bright sunlight to power the stereo, autopilot in standby mode, depth and speed instruments and still charge the batteries. I haven't yet tried them on the chartplotter or autopilot in active mode, but I hardly ever ust the chartplotter, and autopilot only long enough for food and head breaks. More on this later, of course. So far, though, I've been able to get a little over 2 amps out of the panels.

Finally, yesterday the wind was 20 to 25 knots out of the northwest. I wanted to try the new yankee, so I wrestled down the big jib, and set it. Wow! Holy Smokes! I can see this becoming my favorite sail! With just that sail we tooled along at 4 to 6 knots! The boat was totally controlable, and the sail and rig hardly stressed at all. It's perfect! I am thorougly impressed! If you need sails - call Martin at Somerset Sails. Mention my name. I don't know that will help, but it can't hurt.

This summer I'm going to get my friend Lou to take pictures of Inertia under sail. That's how tickled I am with her.

I hope to see you on the water - soon, too!

Sunday, April 02, 2006

Spring is Definitely Here Now

Yesterday it was in the 70s! True, it was threatening rain and blowing up a stink, but very pleasant to work below on the last big project for this year, the solar panel installation.

This required bringing in wires from the seahood (the thing that covers the open companionway hatch) where the panels will be mounted, to the battery bank 1 (the house bank).

Speaking of which, I was watching the Xantrex charge monitor and realized it wasn't indicating battery charging - power always went down, never recovered, which is one of the monitor's big pluses. So a quick call to Jack Rabbit Marine, and some patient explaining by Steve, moving two wires, and badaboom badabing, fuggedabouddit. Here's the thing, all the ground wires must be on the load side of the shunt. That's important - even the charging source grounds. So I moved the shorepower battery charger's ground and the starting battery's ground, and that's that. Also, the solar panel's ground was attached there, but more on that later.

Right, then, back to the solar panels. This is a simple wiring job, and because there is no simple way to electrically from the deck to the batteries with an intermediate cabin stop, I ended up with some exposed wire, but I'll cover that later.

The only interesting thing about the whole installation is that I used wire from Ancor that's round with two #12 conductor wire, one red, one yellow. "Huh?", you might say. "Yellow? Why yellow?"

Traditionally the ground wire in 12 volt systems is black. That's fine on a car where it's all 12 volts. What about in mixed 120 VAC/12 VDC systems like a boat? Black wires are hot for 120 VAC (the others, white is neutral and green is ground). So to avoid confusion, let alone some spectacular sparking, fire, and possible electrocution, ABYC, NMMA, and other boat building associations have decided to make 12 VDC ground yellow.

You might wonder, then, why I used red and black on the rebuilt lights. That's a reasonable question. Nothing, I mean, nothing can be more confusing than changing the color of a wire mid circuit. Even though the lighting connections are very obvious, it's better not to 'improve' on what's already there. For new circuits, use the new standard. Red, hot, yellow, ground.

Back to the solar panels. I decided to put a panel connection on either side of the cabin rather than one connection requiring the panels to be tied together. This is so I can reposition them independently for dockside. Jack Rabbit Marine supplied me with the watertight connectors and the wire clams for going through the deck. I decided on this arrangement because I won't crack anything by stepping on it. Also, it's pretty much out of the way. There's one on the starboard side, too.

Next, I installed a terminal block in the headliner to join the panel leads. This also allows future expansion, should I need it. Here you can see the red and yellow wires. The panels are connected nearest to you and the battery feed is, obviously, on the other side. The terminal block is mounted on a very thick fiberglass pad that the old traveller is bolted to.


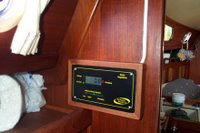
Next, the solar charge monitor panel was installed in a place where I could run most of the wire out of sight in the hanging locker, through a bulkhead into the battery box. The ground, of course, is attached to the shunt and the hot to the main battery bank. The wire I'll cover as soon as I figure out how, but here's what I have to say about that - there is no, I mean no place on a boat for silicone sealant. It virtually guarantees a leak and one that's impossible to fix. However, a little dab behind the wire and it holds it to the wood like that's what it's meant for.

Finally, here's where the cells are going. I'll add another picture when I finish the mount, but this essentially is it. The devices will keep the batteries totally charged, and in bright sun, run the refrigerator as planned.

I'll see you on the water, but with fully charged batteries!